well first thing you need is a 36mm socket..... damn.... i dont have one... so off i went to the hardware shop to buy one......i figured i need to go to big fancy shop to find it but nope... after i went to a few but no luck... the biggest they have is 32mm... i even went to Ace but they didnt have them either.... i finally went to the shop near my house which isnt that fancy....and guess what.... they have a few types!!! but i also need to get a bigger ratchet... :(
ok now to start... Get the 36mm socket onto the that big nut on the fan and a with another hand, get a big/medium screw driver wedged into the slot on the Alternator/Generator to stop it from turning..... once your in position pull on the ratchet to loosen the big nut on the fan... only loosen the nut yah... dont remove it....... as you can see i used a feet on the fan cover for leverage... it was a little tricky trying to keep the generator from moving.......

Ok next, the generator needs to come off.... there is a strap that goes around the generator which you will need to loosen of and get it out of the way... dont bend it too much yah... remove all the bolts on either side of the fan shroud and just pull the whole assembley up and off the engine.. watch the cooling tower which is in side the fan shroud......

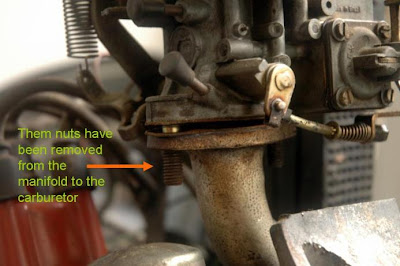
I then removed the carburetor which was pretty straight forward.....

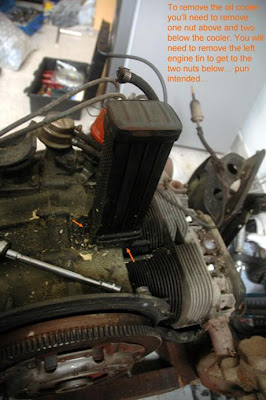
Next i removed the cooling tower. It has one nut on the top of the base and two which are under the base.. you will need to remove the left side engine tin to get to this two nuts....I just went and removed all the engine tin........ Once removed, plug the two holes with a piece of cloth .... yeah i know i dont need to do that since i going to try and dismantle the whole engine but... my engine is pretty dirty with not only grease and oil but alot of loose dirt and dust, paint chips etc etc....

Ok now back to the generator and fan assembly.... Place the shroud on its back with the generator facing up.... Unscrew the four bolts around the fan cover and you will be able to pull the generator and fan out of the fan shroud..........

tada!!!!!! its out......

Ok... now we remove the really big nut we loosened at the very first step earlier..... The fan can be removed now which will expose two more nuts which will remove the fan cover from the generator.

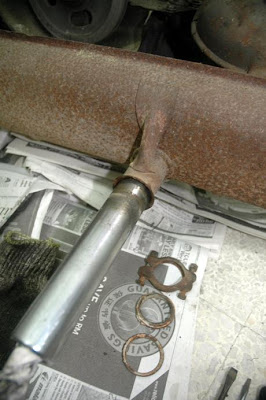
Then i wanted to remove the mufflers..... the one on the right came off after some tugging. You will need to remove the clamps on either side lah.... but the left side muffler didnt budge...... some WD40 here and there and it still didnt move..... somemore WD40 and left over night and it till didnot give up..... well... im not going to give up either.....

After some thinking... i decided to tighten a hose clamp on the muffler then using a hammer i tamped on the tightening screw of the hose clamp while pulling the muffler with my free hand..... it worked!!!!!! but goosh was it tight.... i had to reposition the clamp three time before the muffler came loose........


The intake manifold was easy to remove...... all you need to do is remove all four bolts; 2 on each port and 2 one each exhaust..... Then i set out to remove the exhaust which was as simple as the manifold but.... one of the nuts was rusted solid...... tried my best but landed up rounding off the nut.... so i sprayed it with WD40 and tried chipping on it hoping it would turn....... nope ... nothing happened.... so i leave it to soak in WD40 and left it for a week.........

A week later and it still was not budging so ........ out came the hammer and chisel and saw...... the nut was in such a position that i could not reach with any kind of power tool..... sigh..... the finally aafter 2 hours of banging on it with a chisel and sawing the nut....... it came loose/...... but yes ... i damaged the stud... sigh!.........
As you can seen below, theres not much room for me to move about......... but i dont want to risk leaving the engine outside at the back of the house....... not enough someone has stolen my man hole cover.... dont want anyone making of with my engine......

Engine tin after some scrubbing and cleaning.......

End of PART 1
No comments:
Post a Comment