Monday, February 20, 2012

Winding up the Window Winders

I had to tackle the driver's side window winder mechanism again....... if you didnt read my last post on the window mech assembly then here is a short summary...

My original one was seriously worn-out and broken... so i got a secondhand one and put it in when i put all the door stuff back together...... It worked fine before installing it but as soon as i put it in and tried to wind the window up... it broke....ARRRGGGGHHH!#@%$%%&*!!!  do you know how had it was to put it in in the first place.!!???....   anyways I found another secondhand unit and this time i found one that was worked on so i though for sure that it would be in better condition... it did feel really strong ...didnt matter how hard i tugged at it... it worked.... BUT!!! when i got home only then did i find that the number of teeth on the slotted end of the winder was wrong... they had replaced it with some other model... or maybe even from some other car... so i cldnt use the original beetle winders...

SO once again i had to remove the whole thing....

this time i got fed up.. so since i already had a right side that was opened up ... i grinded out the welds and removed the gear... went out and bought another secondhand window winder mech but this time for the left passenger door... since it is mostlikely not as worn out as the driverside one...

I then drilled out the crimps and took that gear out... and slapped it into the right side window winder... bolted the whole thing back together... put the whole assembly back into the door.... and prayed to the heavens that it wont brake...

IT DIDNT!!!!!!!!!!.... interestingly it now works better than my passenger side door.... go figure...


The left side gear above placed in the right side assembly

Its been a year now in use and still works smoothly ....


(Please note if you do something like this im not responsible for any damage and or injuries like a loss of a limb or an eye) 

Thursday, February 02, 2012

Door Handles

During the month or so of waiting for the approval letter from JPJ .... I manage to do a few things on the car... namely the Door Handles. Interior door cards and the Fuel Pedal.... oh and also the horn.

The car came with an original stainless steel wrapped passenger side door handle but had a recast driver's side handle... which never fit properly on the car and was horribly pitted...

I was not having any luck finding a stainless steel wrapped 65 driver's side handle... until one day i found a one for a 66 on Mudah... i just grabbed it cos it was in super good condition but i knew that the key mech and the inner stuff will not work on a 65... but i figured i will swap the inner stuff from the 65 to the 66... and it worked...

This is the 66 stainless steel wrapped driver's side door handle....... was so happy to find it...

The 65 on the left has a sliding locking mech while the 66 on the right has a paddle style lock... swapped over these elements and i put it on the car....   It fit like a glove....


Tuesday, January 31, 2012

I AM THE LAW~~~~!!!!!!!!!!!!!


AAARRRRGGGGHHH!!!!!

GAGAL!!!!!!! FAIL Fail!!!!!!

yup thats what i got after the PUSPAKOM inspection... This is the governing body commissioned by the road transport department to inspects all Vehicles on the road... I had to get the car inspected because its been off the road for so many years...

they mentioned that it failed the alignment test and they want a letter from JPJ for the new floors that were put in.... sigh.... My guess is that the i need to rebalance the wheels... I got it balance at a shop near the house and when i went there to complain the guy confessed that he had used settings for VW Beetle as in the NEW BEETLE.... @#^$#$@$E@... stupid moron... of cos being a typical malaysian shop i didnt get a refund but they offered to give me a free balancing and alignment work done for my car...
gave him a look and drove out of there. Then i went to the shop i originally bought the tyres from and he did a great job la,,... i was so stupid not coming here in the first place

Then I went to JPJ (the road transport department) and interestingly they are wondering why PUSPAKOM is making such a fuss about my floorboards... they said that they only do inspection on floorboards for commercial vehicles only.... but agreed that a letter of 'ubah suai' (replacement and repair) is needed when replacing floorboards... but again complained about puspakom pushing the matter to them...

So they said they can do me a favour and said that inspection is by appointment only which they set ta date in two weeks time !!!!!!!!!!!!!TWO WEEKS!!!!!!!!!!!

Then I went to JPJ (the road transport department) and interestingly they are wondering why PUSPAKOM is making such a fuss about my floorboards... they said that they only do inspection on floorboards for commercial vehicles only.... but agreed that a letter of 'ubah suai' (replacement and repair) is needed when replacing floorboards... but again complained about puspakom pushing the matter to them...
So they said they can do me a favour and said that inspection is by appointment only which they set ta date in two weeks time !!!!!!!!!!!!!TWO WEEKS!!!!!!!!!!!

My local vw club was saying this sounds soooo fishy... as in are they fishing for money... anyways....

he got back after half hour with a file with him... asked me more questioned and got a copy of my id and licence and then told me it would take a week to file the report and a letter will be issued when its approved...

I tell you it was one confusing month... looks like what everyone is saying is right.... jpj themselves dont know whats going on within the rules and regs and guidelines ..... SNAFU!!! alert...
after going from one counter to the other... then from one officer to another... as you all know i got a date for JPJ to inspect my car... which i had to wait two weeks... and when that date arrived i went there early and handed in my car to the officer... who told me to go have breakfast and then said he will call me once they were done...his estimate was around 10am (which meant he wanted to go have breakfast first lah).... after waiting for two hours... i sneaked back to the inspection area to find my car parked at one side... and nobody was around... when asked at the counter if the officer was around and if my car was done... i got the usual "oh dia pergi minum" (he went for a drink) a few minutes later the officer arrives and tell me that the inspection is done and in a weeks time a letter of approval will be issued..

One week later and i didnt get any neas from them... So I called the officer and he said that the letter is ready but just need his director's signature.... and guess what?? The director is on vacation///....

Malaysia Boleh

After two weeks i still dont hear from them...... so I called them up again and he says come by next week as the director will be in.... Wow... i didnt know Directors in a government office can take more than one month holiday... so i let a week go by and i then i just showed up there to surprise them... and he sure looked at me surprised.... I just asked 'Is the director around to sign my approval letter?' and he says yes... 15 minutes later i drive out of there with my beetle endorsed by JPJ........ and guess what... I didnt pay a single sen... HAHAHAHAHAHAHAHAHA!!!! scumbags!!!

I drive in to PUSPAKOM early the next morning and to my surprise i got into a priority line because one of the officers mistakenly thought i was VIP........ seriously so you mean the rest of society has to line up for hours waiting their turn... while the VIP just cuts into the line...

When they suddenly realized i wasnt a VIP all of them were looking at each other like they were trying to pin the fault on someone... KEKEKEKEKEKEKEKE the look on their faces was priceless....

a few minutes later im out of there with my approval certs.......

HAHAHAHAHAHAHAHAHAHAHAHA so long suckersssssssssssssss!!!!!!!!!!!!!

with all those documents i finally get my insurance and road tax done.... and the next day the Beetle is finally road legal again............!!!!!!!!!!!!!!!!!!!

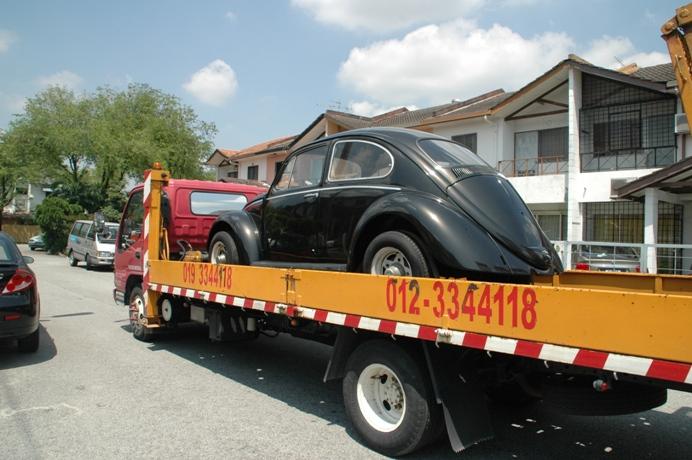
15th of August 2011.... the day my Beetle was road legal again.... sigh.... finally....


Tuesday, January 03, 2012

Upholstery

Its custom.... but kept to look like original...  very very slight difference to an original design but ofcos the material is not original at all...

...i love it


I managed to find a 65 driver's side seat but still cldnt find a passenger side one... so my 66 passenger side seat will do....


Picked up the rear seats from the shop but i cant seem to find a before shot of the seats.... hmmmm


Sent the front seats to the shop and after a few days went to visit.....   


 The car pretty dusty at the upholstery shop........ but still looks goood..........

Nope im going to leave those wheels like that.....

Friday, October 28, 2011

Rats nest be gone

this is the trunk as of Jun 2011


finally doesnt look like rats nest...

Monday, June 06, 2011

Smoothies anyone???

The old wheels come off.... and remember the smooties i bought a few months ago........

Well,,, they've been sandblasted, powdercoated and rapped with some new 80 series tyres.... yummy....

Sunday, June 05, 2011

Are we there yet!!!!!!

...... well not yet.... but atleast its at home.... and its ALIVE!!!!!!!!!!!


Temporarily put the rear lenses on....... me likey 

Saturday, June 04, 2011

Are We There Yet

a week later break system is almost complete and the wiring is almost done...
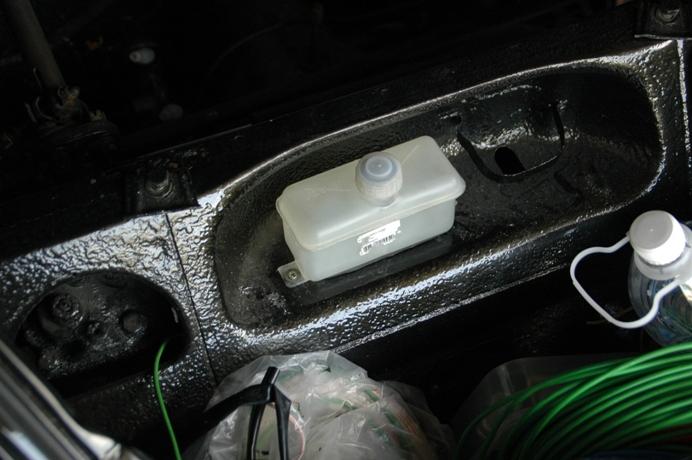
Dual circuit reservoir placed were the water reservoir used to be...

Wiring almost done....


Engine READY!!!!!!!!!! to go back into the car!!!!

hmmmmm!...

Friday, June 03, 2011

Off to see the Wizard!!


i've done all i can on my own...... everything else will be done at the shop

Thursday, June 02, 2011

Exhaust replacement


Old Exhaust ..........

New Exhaust........

New Exhaust..... painted BBQ pit paint...

Wednesday, June 01, 2011

Engine coming together 1


AAArrrrrGGGhhhh!!!! dont make me angry!!!!... you wont like me when im angry!!!!!!!....


a few days later.....

Tuesday, May 31, 2011

Main Harness Snaked into Car May 2011


Ok so everyone knows i got a LHD wiring harness set from Wiring Works... its an excellent kit but how do i use it for a RHD car......

So i had this bright idea of running the harness through the right side of the car and reverse all the headlight and signal light wires from left side to right side.... interestingly it worked..... but every other wire that ran from the fuse box to all the switches on the dashboard did not quite line up and needed to be extended....

anyways below are a few photos of my attempt to wire my right hand drive car with a left hand drive wiring harness...


I drilled out an exit hole at the rear next to the battery area
then i drilled these holes at the front of the door frame
then another hole at the trunk... tried to get it to look like the hole on the left side of the car....
Cleaned up the fuse box.... all the copper soaked in coca cola for 10 minutes...

Main harness snaked in from the engine compartment and down to the battery area....
then put through the hole i made near the battery area.... then snaked towards the front along the door sill...
.... and through the two holes and straight up through the hole in the trunk....
the main harness reached the fuse box. starter wire, generator and oil pressure wire all reached their respected switches and fuses....
switched the right side light wires to the left side and vice versa ......

.... but the horn wires, high beam wires and ignition wires could not reach their switches... duh!!!.... all these were extended and extra earthing were put in by a proper auto electrician... which will be done at the shop where the engine is being rebuilt....

Monday, May 30, 2011

Misc Seals in the trunk May 2011

This is the headlight bucket-to-truck seal.... went in with a lot of silicone grease and a lot of fingering... my fingers where numb for a week (wuss)


anyways the signal light seal wasnt cooperating like the other seal...the part that goes into the trunk was so big that it didnt fit into the hole in the trunk .... even with lots of silicone grease and alot of fingering it didnt want to budge.... at last i after literally two hours... i shaved some of the rubber and got it in... then i looked at it and said WHAT THE HELL DID I DO???!! it looked terrible... i know nobody is going to notice it but.... sigh.... im not going to show you guys how it looks like here... anyways so the right side is in and i didnt want to do the same thing to the right side...

so... i used my brains this time and used a taped up small screw driver to drive the rubber into place... it worked and i didnt have to shave the rubber at all... although i did had to use a lot of force...... now if only i did that the first time with the left side...
here is the right side all nice and all....